How To: Repair Your F3 Fuel Pump
#1
 10-13-2009, 08:06 PM


Fuel Pump Repair
So, you think you're having problems with your fuel pump. Symptoms include, it won't start, or you're riding along and it seems like it's running out of gas. These are common problems on the F3. From a stealer, it's going to run you $160 for a new one. On the Internet, it's as low as $120. That's still a lot of money considering what's going wrong with them. I can tell you from personal experience that I purchased a new OEM pump from Honda and in 15 months it was having problems. Granted, we had put about 12,000 miles on it, but still. If you go with ebay, you're getting a used one. Who know's how long that's going to last.
I'm not going to cover the details of removing the fuel pump from the bike, it's a fairly straight forward process.
Skills and Tool Required
Good with general hand tools, as well as the ability to do some basic soldering (1 wire). About an hour of time from beginning to end. Parts cost is about $40 if you include tax. I got the replacement Switch Contacts from Cycle Gear (it did have to be ordered, but was there in less than a week. Mention their K&L Catalog, under fuel pumps.). I've also seen them on ebay, but you're going to pay $9 to $12 for shipping from some of these guys. I've also found out that Tucker Rocky is carrying the K&L part as well. It's on page 1097 of the 2011 Street catalog. They show MSRP of $32.59. Cycle Gear also has this catalog, so it makes it another source to find them.
OK, ready to get started, great. Here we go. (I'm doing the work on a 1997 F3, but any year F3 would be the same)
Tools needed.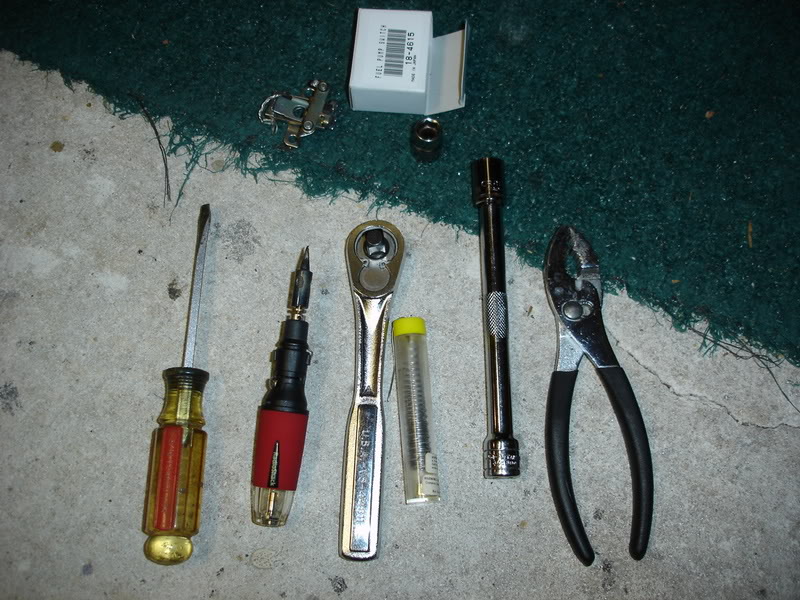 [/IMG]
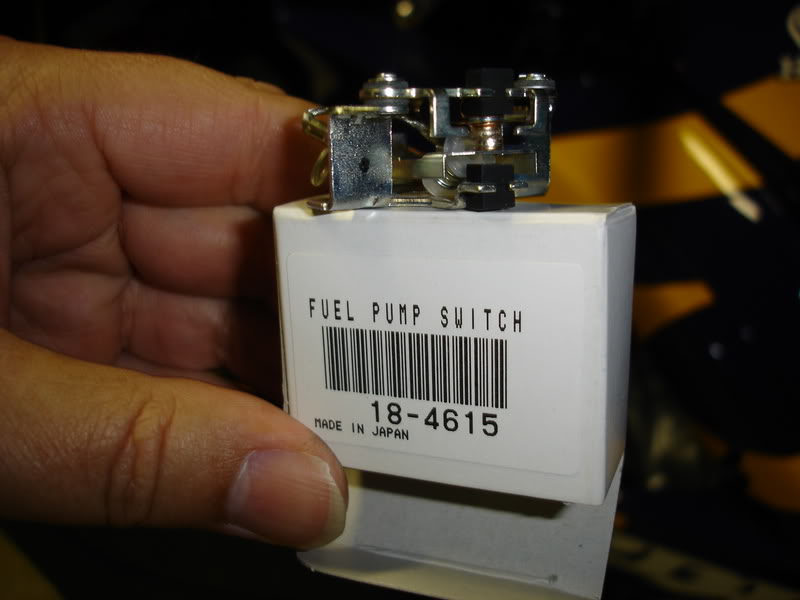
Here's the part we're going to install.
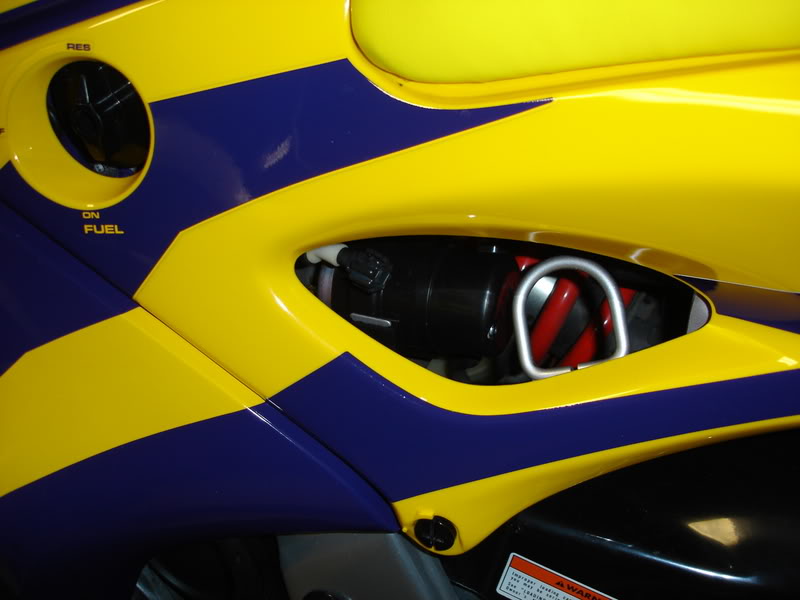
The fuel pump is located on the left side of the bike behind the side cover. You can see it through the opening behind the fuel petcock. It is held in place by a rubber boot and has a black cap on one end that is held in place with 1 phillips screw.
Remove the left and right side covers, which will allow you to then remove the seat (2 bolts). This is going to give you access to the bolts that hold on the fuel tank. You don't have to remove the tank, but raising the rear of the tank about 4" gives better access and visibility to the fuel hoses. The tank has 2 drain hoses attached to the underside that you should be able to just slide off using a flat screwdriver.

Make sure you've turned off the fuel petcock, otherwise you're going to have fuel running all over the place. Place a rag under the fuel pump and lines to catch any fuel that is likely to spill as you remove the lines. Remove the fuel pump by disconnecting the 2 fuel lines. The lines are held in place by hose clamps that are easily moved with a pair of pliers, then use a flat screwdriver to slide the hoses off the pump. After that, there is one (1) electrical connector attached to the fuel pump wiring harness. It connects up above the pump towards the center of the bike under the tank. Once you have the pump out, there is one phillips screw holding a black cap on the end of the fuel pump. It has some black paint on it. Use a small screwdriver to scrape the paint off the head of the screw so you can remove it. The cap is a little snug as it has an "O" ring under it to help seal out dust and dirt.
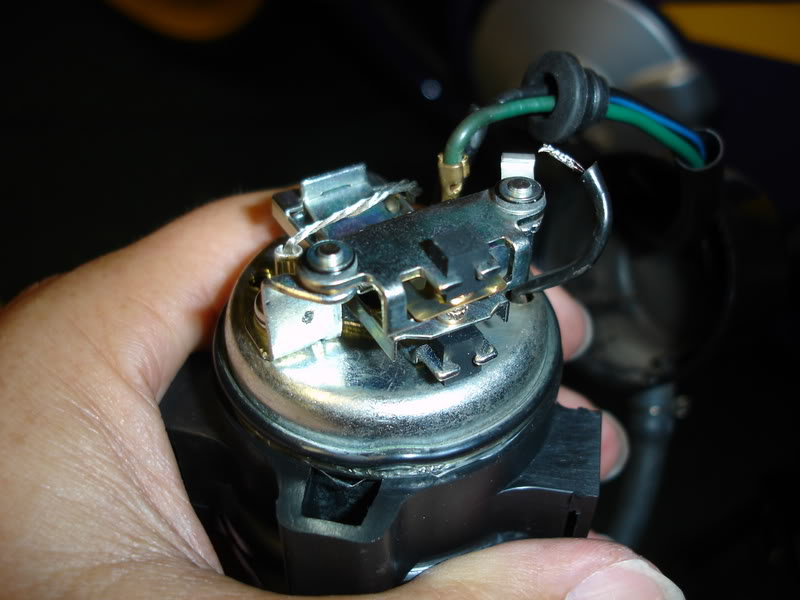
Once you have the cap off, here's what you have. The little rubber grommet on the wiring harness will slide up the wires with a little encouragement. Some WD-40 on the wires helps it slide up too.
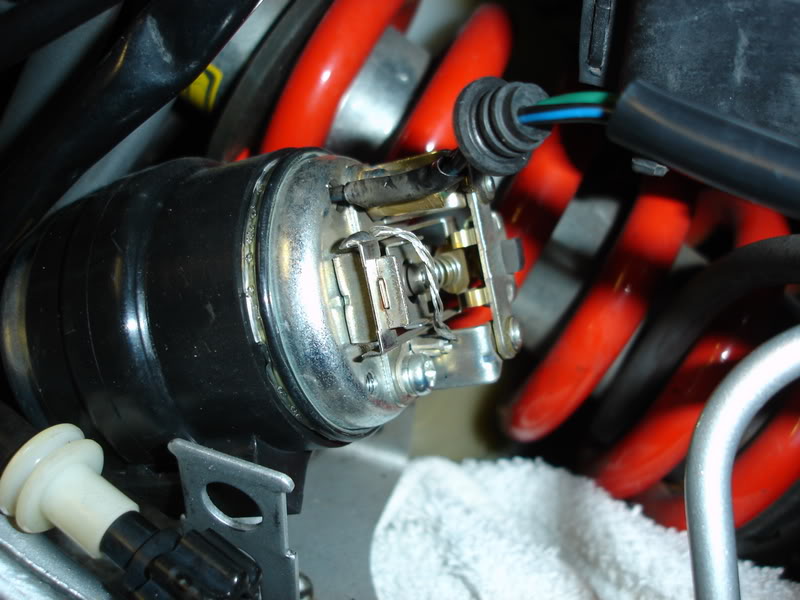
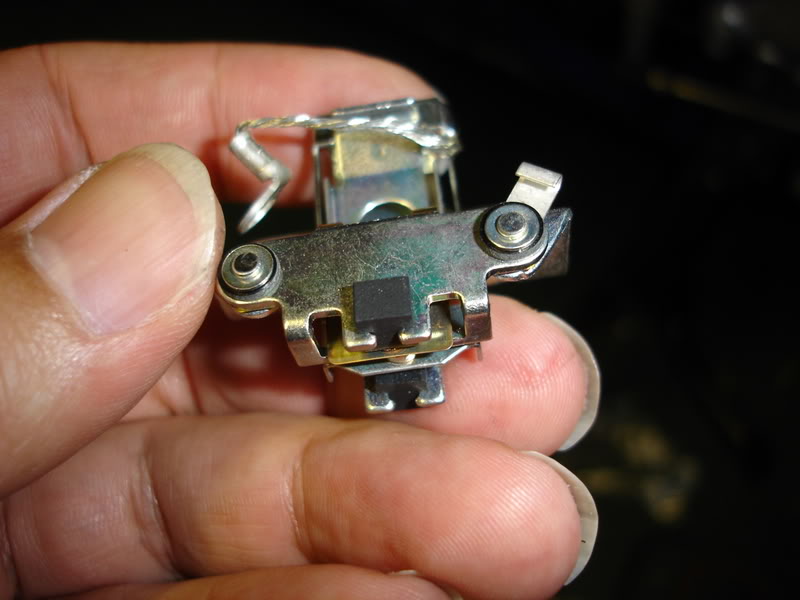
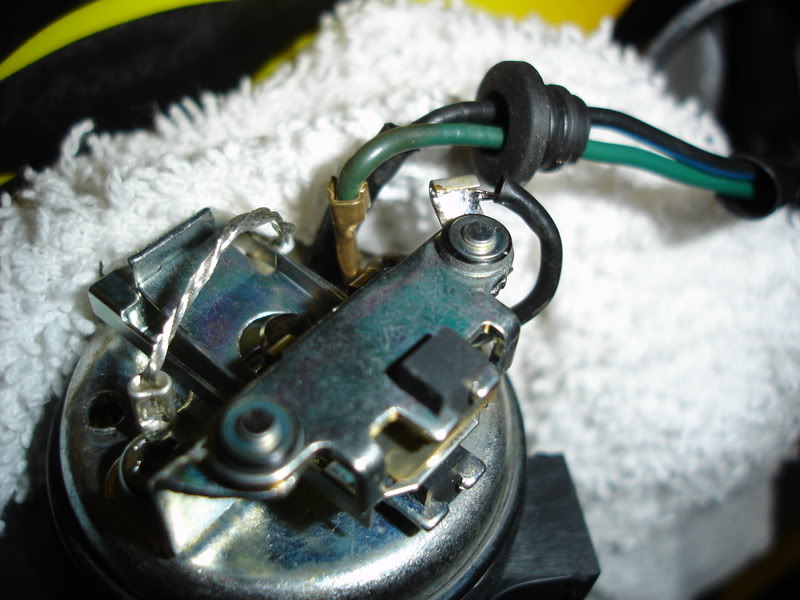
In the next photos you can see the worn and burnt contacts. These contacts open and close rapidly while the pump is running.
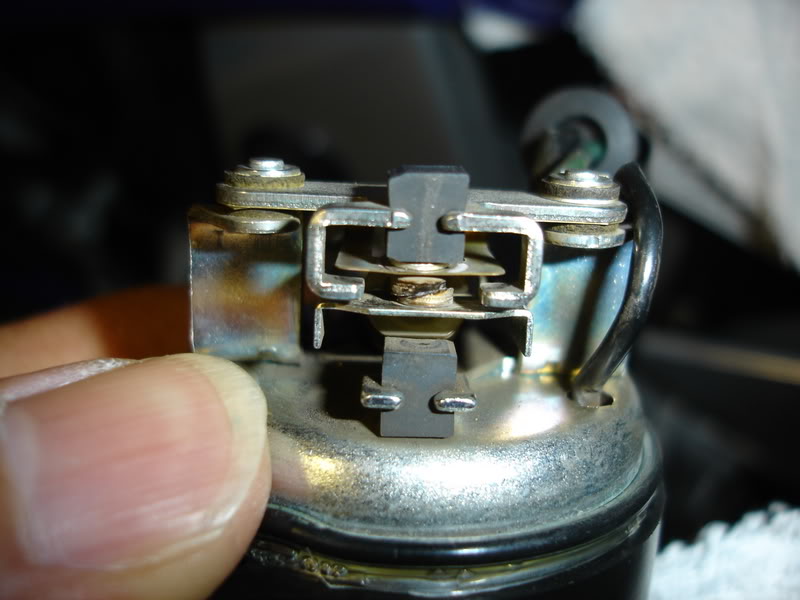
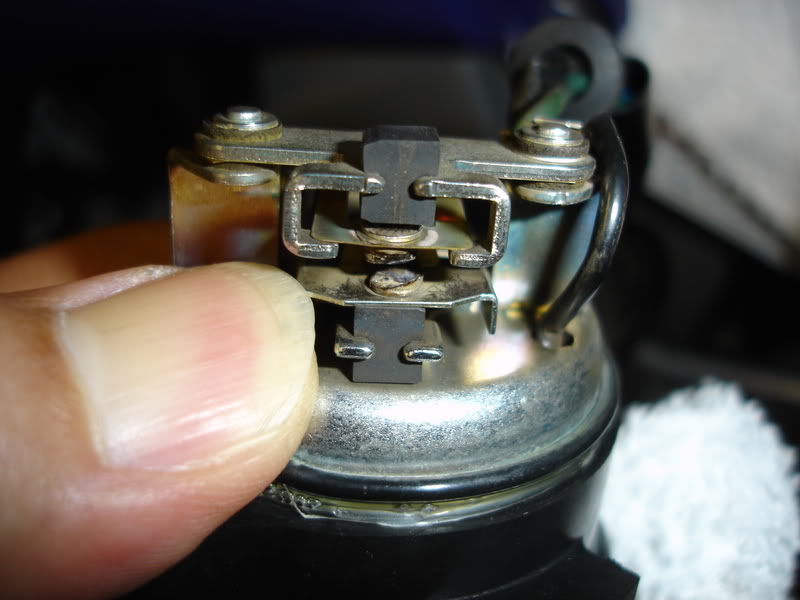
It's these contacts that need replacing. In the following video you can see the action of the pump with the old contacts. In fact, at about 23 seconds into the video, the pump sputters and stops running (this is what causes you to get stuck on the side of the road). The video then fades to how it looks and runs with the new contacts in place.
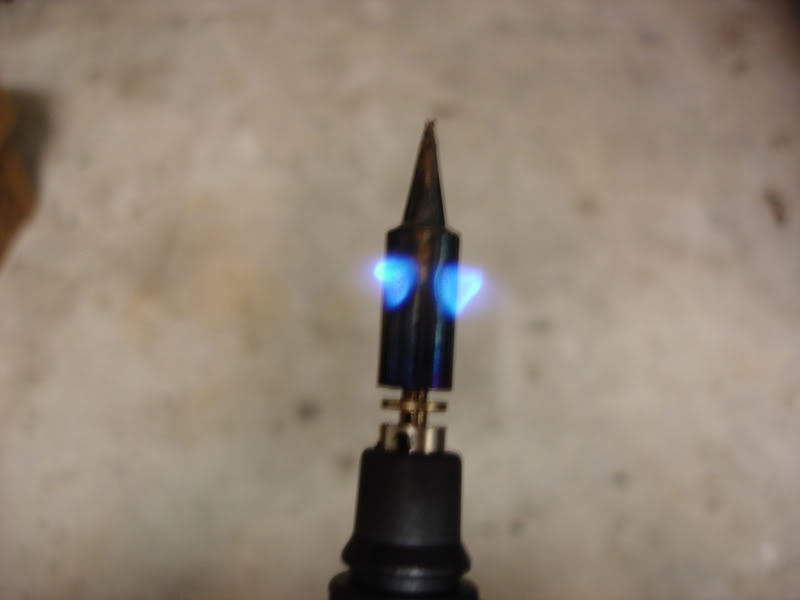
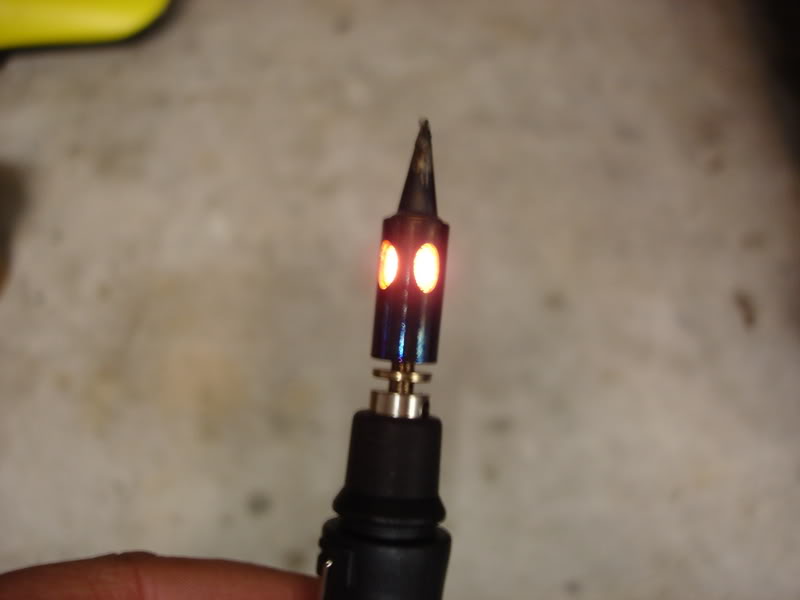
I use a gas soldering iron because it's portable and heats up real fast. All you have to do is heat the solder on the tab where the single black wire that comes out of the top of the fuel pump until it melts, and pull the wire out of the tab. Be carefull, it's hot and the solder will burn you.
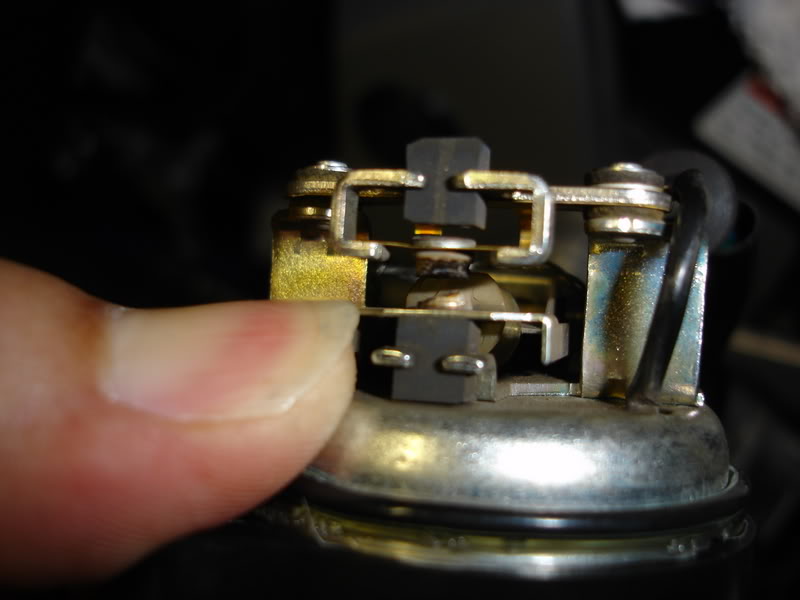
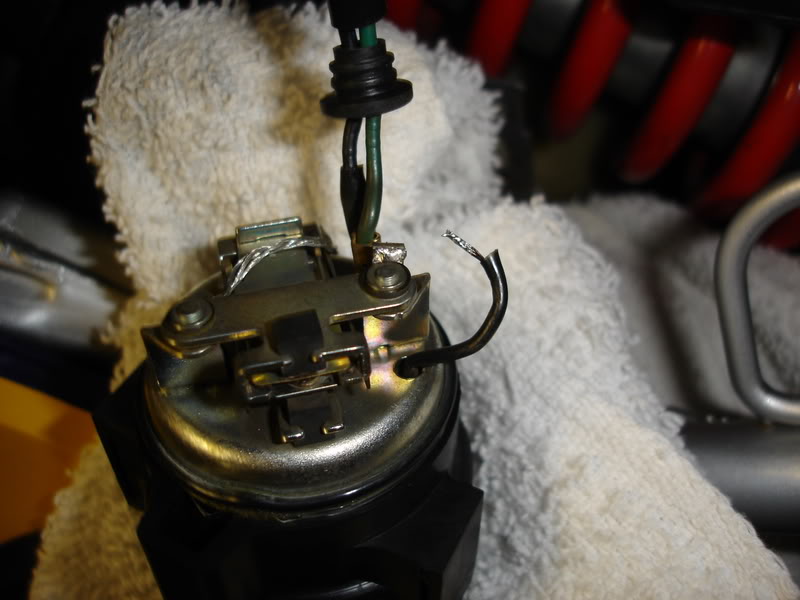
The wire will look like this when you remove it. Just move it a little out of the way.
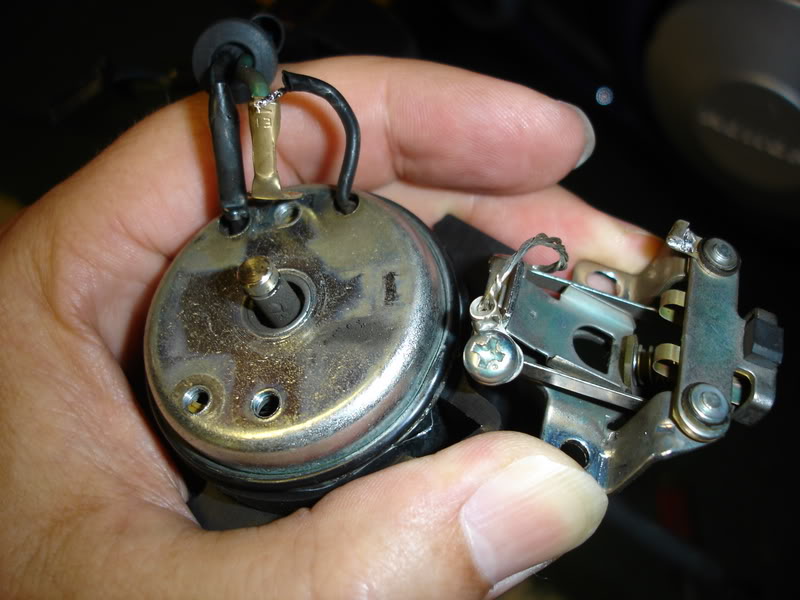
All you have to do now, is to remove the 2 phillips screws that hold the contacts to the top of the pump and remove the old contacts. The ground strap that is attached to the contacts goes on the screw that's on the opposite side of the pump from the black wire that you unsoldered. The Green wire goes under the screw that's on the same side as the black wires. The plunger shaft of the pump has a groove in it near the end of the shaft. The Switch Contacts need to engage this groove when you install the new contacts. The movement of that plunger up and down is the action that opens and closes the Switch Contacts. You'll notice that the opening in the Switch Contacts has a flat side on it that that needs to be in the groove on that shaft.
Take out the new Switch Contacts and inspect them. You'll notice they have much more material on the electrical contacts than the one you're removing. Also note the tab where you need to solder the black wire to after you've installed the contacts onto the pump.

Screw the new Switch Contacts onto the top of the fuel pump, making sure that you've engaged the flat spot from the contacts with the groove in the plunger shaft.
Place the small black wire into the tab, heat it up with the soldering iron, put a little solder on it, and you're done with the soldering.
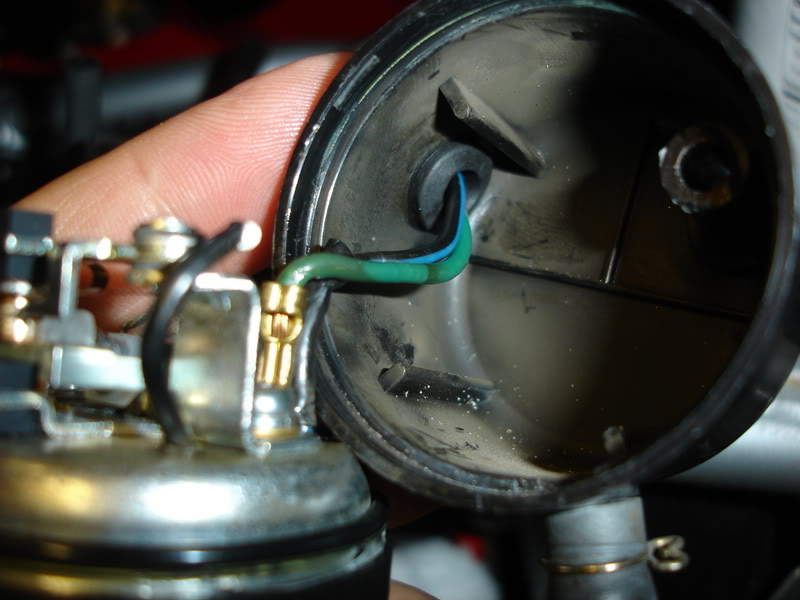
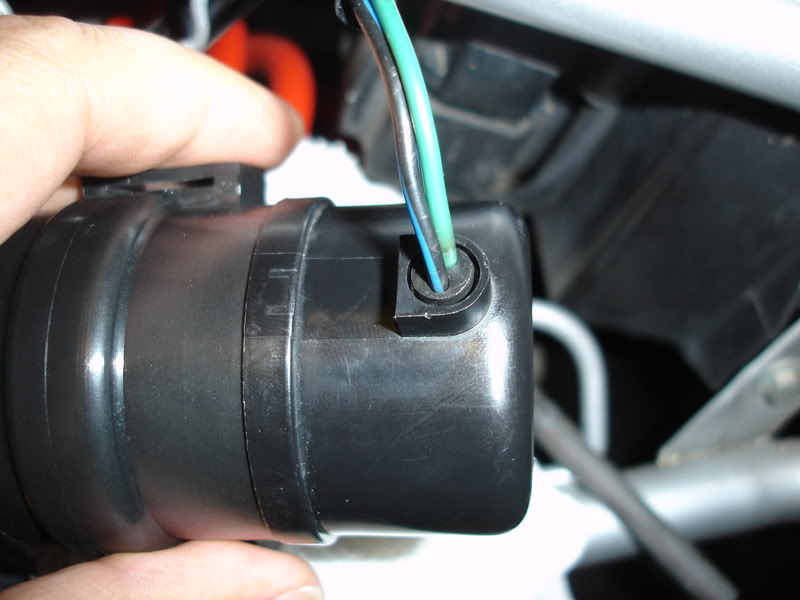
By putting a little WD-40 on the insulation of of the wires where the rubber grommet is, you'll be able to slide the grommet up a couple of inches or so. That way you'll be able to push it into the black cap properly so that it seals the wiring harness where it comes out of the top of the cap. Here is an inside and outside view of the harness as it goes through the cap.
Put the cap back on, put the single phillips screw back in place. Put the fuel pump back in position in the mounting plates and re-attach the fuel lines. The line closest to you is going to the carburetors, the line further away is coming from the tank by way of the inline fuel filter.
That All There Is To It
Now, just put the tank back in place, reattach the vent lines, put the seat back on, then the side covers and you're done. This is a much better repair than having to purchase a new fuel pump or going with a used one.
I hope this helps you. Let me know what you think and if you have any questions or feel I left anything important out.
So, you think you're having problems with your fuel pump. Symptoms include, it won't start, or you're riding along and it seems like it's running out of gas. These are common problems on the F3. From a stealer, it's going to run you $160 for a new one. On the Internet, it's as low as $120. That's still a lot of money considering what's going wrong with them. I can tell you from personal experience that I purchased a new OEM pump from Honda and in 15 months it was having problems. Granted, we had put about 12,000 miles on it, but still. If you go with ebay, you're getting a used one. Who know's how long that's going to last.
I'm not going to cover the details of removing the fuel pump from the bike, it's a fairly straight forward process.
Skills and Tool Required
Good with general hand tools, as well as the ability to do some basic soldering (1 wire). About an hour of time from beginning to end. Parts cost is about $40 if you include tax. I got the replacement Switch Contacts from Cycle Gear (it did have to be ordered, but was there in less than a week. Mention their K&L Catalog, under fuel pumps.). I've also seen them on ebay, but you're going to pay $9 to $12 for shipping from some of these guys. I've also found out that Tucker Rocky is carrying the K&L part as well. It's on page 1097 of the 2011 Street catalog. They show MSRP of $32.59. Cycle Gear also has this catalog, so it makes it another source to find them.
OK, ready to get started, great. Here we go. (I'm doing the work on a 1997 F3, but any year F3 would be the same)
Tools needed.
- Screw drivers, slotted and phillips
- Slip joint pliers
- Soldering iron and solder
- Fuel Pump Switch Part Number 18-4615
- Socket wrench with a 10mm and 12 mm sockets.
[/IMG]Here's the part we're going to install.
The fuel pump is located on the left side of the bike behind the side cover. You can see it through the opening behind the fuel petcock. It is held in place by a rubber boot and has a black cap on one end that is held in place with 1 phillips screw.
Remove the left and right side covers, which will allow you to then remove the seat (2 bolts). This is going to give you access to the bolts that hold on the fuel tank. You don't have to remove the tank, but raising the rear of the tank about 4" gives better access and visibility to the fuel hoses. The tank has 2 drain hoses attached to the underside that you should be able to just slide off using a flat screwdriver.
Make sure you've turned off the fuel petcock, otherwise you're going to have fuel running all over the place. Place a rag under the fuel pump and lines to catch any fuel that is likely to spill as you remove the lines. Remove the fuel pump by disconnecting the 2 fuel lines. The lines are held in place by hose clamps that are easily moved with a pair of pliers, then use a flat screwdriver to slide the hoses off the pump. After that, there is one (1) electrical connector attached to the fuel pump wiring harness. It connects up above the pump towards the center of the bike under the tank. Once you have the pump out, there is one phillips screw holding a black cap on the end of the fuel pump. It has some black paint on it. Use a small screwdriver to scrape the paint off the head of the screw so you can remove it. The cap is a little snug as it has an "O" ring under it to help seal out dust and dirt.
Once you have the cap off, here's what you have. The little rubber grommet on the wiring harness will slide up the wires with a little encouragement. Some WD-40 on the wires helps it slide up too.
In the next photos you can see the worn and burnt contacts. These contacts open and close rapidly while the pump is running.
It's these contacts that need replacing. In the following video you can see the action of the pump with the old contacts. In fact, at about 23 seconds into the video, the pump sputters and stops running (this is what causes you to get stuck on the side of the road). The video then fades to how it looks and runs with the new contacts in place.
I use a gas soldering iron because it's portable and heats up real fast. All you have to do is heat the solder on the tab where the single black wire that comes out of the top of the fuel pump until it melts, and pull the wire out of the tab. Be carefull, it's hot and the solder will burn you.
The wire will look like this when you remove it. Just move it a little out of the way.
All you have to do now, is to remove the 2 phillips screws that hold the contacts to the top of the pump and remove the old contacts. The ground strap that is attached to the contacts goes on the screw that's on the opposite side of the pump from the black wire that you unsoldered. The Green wire goes under the screw that's on the same side as the black wires. The plunger shaft of the pump has a groove in it near the end of the shaft. The Switch Contacts need to engage this groove when you install the new contacts. The movement of that plunger up and down is the action that opens and closes the Switch Contacts. You'll notice that the opening in the Switch Contacts has a flat side on it that that needs to be in the groove on that shaft.
Take out the new Switch Contacts and inspect them. You'll notice they have much more material on the electrical contacts than the one you're removing. Also note the tab where you need to solder the black wire to after you've installed the contacts onto the pump.
Screw the new Switch Contacts onto the top of the fuel pump, making sure that you've engaged the flat spot from the contacts with the groove in the plunger shaft.
Place the small black wire into the tab, heat it up with the soldering iron, put a little solder on it, and you're done with the soldering.
By putting a little WD-40 on the insulation of of the wires where the rubber grommet is, you'll be able to slide the grommet up a couple of inches or so. That way you'll be able to push it into the black cap properly so that it seals the wiring harness where it comes out of the top of the cap. Here is an inside and outside view of the harness as it goes through the cap.
Put the cap back on, put the single phillips screw back in place. Put the fuel pump back in position in the mounting plates and re-attach the fuel lines. The line closest to you is going to the carburetors, the line further away is coming from the tank by way of the inline fuel filter.
That All There Is To It
Now, just put the tank back in place, reattach the vent lines, put the seat back on, then the side covers and you're done. This is a much better repair than having to purchase a new fuel pump or going with a used one.
I hope this helps you. Let me know what you think and if you have any questions or feel I left anything important out.
Last edited by IDoDirt; 07-24-2017 at 08:37 AM. Reason: Fixing photo links
The following 2 users liked this post by IDoDirt:
NuggyBuggyCBR (07-25-2022),
Zaphod (11-05-2021)
#2
10-13-2009, 09:43 PM
 Well at least until my bike goes for its registration inspection next week)
#4
10-14-2009, 08:53 AM

Senior Member
Join Date: Mar 2007
Location: Central Wisconsin
Posts: 624
Likes: 0
Received 0 Likes
on
0 Posts
#5
10-15-2009, 06:30 AM
I'm assuming that when you're referring to something "hotter" that you mean with more pressure. Remember that the only purpose for this pump is to fill the bowls of the carburetors. Once they get full, then the FLOAT presses up on the FLOAT VALVE and stops the flow of fuel. If there was any significant amount of pressure from the fuel pump, then it would push open the FLOAT VALVE and flood the carburetors. If I had to estimate the amout of static pressure, I'd say maybe 2 psi, but that's just a guess.
#7
10-15-2009, 08:46 AM

Junior Member
Join Date: Oct 2009
Location: new jersey
Posts: 20
Likes: 0
Received 0 Likes
on
0 Posts
I'm assuming that when you're referring to something "hotter" that you mean with more pressure. Remember that the only purpose for this pump is to fill the bowls of the carburetors. Once they get full, then the FLOAT presses up on the FLOAT VALVE and stops the flow of fuel. If there was any significant amount of pressure from the fuel pump, then it would push open the FLOAT VALVE and flood the carburetors. If I had to estimate the amout of static pressure, I'd say maybe 2 psi, but that's just a guess.
#8
10-15-2009, 12:22 PM

Dirt,
Superb write up. Thanks for taking the time and effort to help the rest of us. At 25K I'm sure mine isn't too far off from dying. I'm glad to see it can be repaired and so easily. I might take mine apart this winter just to check it. If the contacts look like they're worn out I'll just repair it over the winter and not risk getting stuck along the road on a long trip.
Thanks Again,
Manuel
#9
10-15-2009, 05:55 PM
But I like the way you think....
PS
This is going to date me, but years ago a friend of mine put a supercharger (not turbo) on a 1978 CB 750 Four. It was fast, but basicly unridable. The difference between off boost and on boost was drastic. He could really light up that rear tire a will. I hadn't thought about that in a long time...
#10
10-16-2009, 11:19 AM

Senior Member
Join Date: Jan 2007
Location: NJ
Posts: 132
Likes: 0
Received 0 Likes
on
0 Posts
OMG idodirt, its just beautiful. Very nice info. I wish I knew that before. It would ve saved me $300 on towing. First time I got stuck on the road I didn't even think It was the pump that failed. Bought one off eBay - same results. Bought another one off Ebay...same story. So much hassle and even thinking of selling the bike... This procedure should ve been put in manuals as regular maintenance. Such an easy fix can save you $$$ and time.
Once again. Great job. Thanks for the info.
Once again. Great job. Thanks for the info.